

If you are a FUTA student, you already know that knowing where you are going is one thing. Getting there without confusion is another matter entirely.
One minute you are trying to locate South Gate. Next minute somebody has mentioned North Gate, Obanla, Senate Building, Engineering Building or another campus spot, and you are looking at your phone like it personally offended you.
Transport can be another story. You want to enter a keke, but you also want to know what the trip will cost before you start moving. You want to know when the rider is coming. You want to know when the ride has arrived. And after the trip, you should be able to rate the operator.
That is where DexTask Rides & Routes comes in.
This guide will show you exactly how to use it for walking directions, bicycle routes, personal car navigation, Campus Keke booking, shared keke rides, live ride tracking, in-app chat, and post-trip rating.
Why moving around FUTA still stresses students
Moving around a university campus sounds easy until you actually have somewhere important to be.
You could be heading to the Senate Building for something, trying to get to a gate, moving between different parts of campus, or simply trying to get back after a long day. As a fresher, even a location that sounds obvious can suddenly become a full investigation.
And transport has its own drama.
You do not want to stand somewhere asking five different people for directions when you can simply open DexTask and search the destination yourself.
You also do not want to start a keke trip without understanding the fare. With DexTask, the fare is shown in the app as a total amount in naira. Where applicable, the rider option can also show a pickup fee line.
The idea is simple: use the app before you move, not after you have already entered the keke and started negotiating your destiny 😂.
The main tool you need is called Rides & Routes.
On the DexTask Launchpad, you will see:
Rides & Routes Book a keke or get directions
Tap that tile and let the app handle the navigation side of things.
Open DexTask the right way (Rides & Routes)
Getting into the mobility section is straightforward.
You do not need to search through random menus looking for transport. Rides & Routes is available directly from the DexTask Launchpad.
Here is the basic process:
- Open DexTask.
- On the Launchpad or home screen, tap Rides & Routes.
- Wait for the map to load. You may see Loading the map to book a keke or get directions…
- When DexTask asks for location permission, allow location access so your pickup location can lock correctly.
- Once the map is ready, you will be on the Rides & Routes screen.
You will also see a search box with the prompt:
WHERE ARE YOU GOING?
That question is basically your transport problem being reduced to five words.
Type the campus place you want to reach, choose the correct result, and continue from there.
For example, if you need directions to the Senate Building, type Senate Building into the search box and select the correct result.
You can also search for places such as North Gate or South Gate when you need them as destinations.
If you search for a place and it is not available, DexTask may show:
Don't find what you're looking for?
You can then use Add suggestion or Suggest a campus place to suggest a campus location.
That is much better than standing around looking confused while your friend says, "You should have turned somewhere back there."
WALK OR BICYCLE WHEN YOU JUST NEED DIRECTIONS
Not every trip needs a keke.
Sometimes the place is close enough to walk. Sometimes you prefer a bicycle route. Sometimes you simply want clear directions before you start moving.
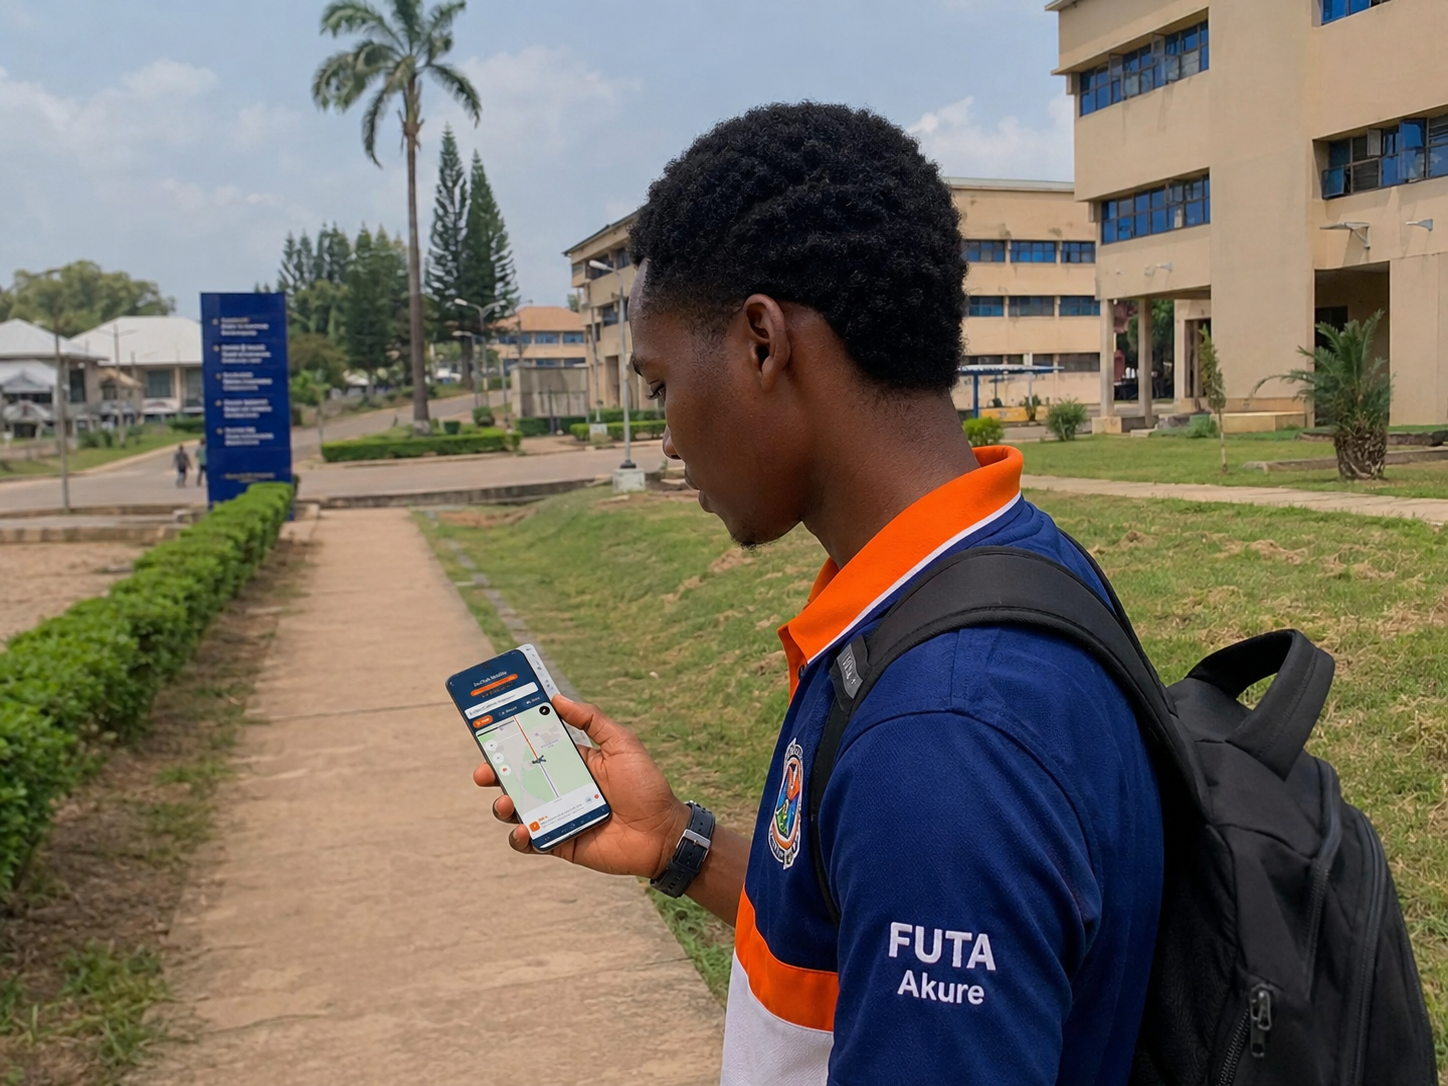
DexTask Rides & Routes gives you Walk and Bicycle modes for this.
The important part is that you do not have to guess the route. You enter the destination in the app, review the route estimate, and start navigation.
You can use this when heading toward a campus destination such as Senate Building, North Gate, South Gate, West Gate, Akindeko Hall, or another place available in the campus.
Once you select your destination, DexTask can show the estimated distance and duration.
That gives you a better idea of the journey before you start.
EXACTS TAPS: Walk to a campus place
For example, imagine you want to walk to Senate Building.
- Open DexTask.
- Tap Rides & Routes on the Launchpad.
- Wait for the map to load.
- Allow location access when asked so your pickup or current location can lock. Tap Walk.
- Tap the search box Where are you going?
- Type Senate Building.
- Select from the dropdown result as you type.
- Review the estimated distance and duration.
- Tap Start Navigation.
- In the FutaMove Route Summary, tap Begin Navigation.
- Follow the turn-by-turn navigation strip and voice cues.
- If you do not want voice instructions, mute them.
- When you are done, use the X to end navigation.
The same general process works for Bicycle. Instead of tapping Walk at step 5, tap Bicycle and continue with your destination search.
The self-navigation experience uses the brand name FutaMove, so do not be surprised when that name appears after you start the route.
Drive mode: personal car navigation vs booking a ride
This is where things become interesting.
When you tap Drive, DexTask gives you options for getting to your destination.
You can use Drive for your own car, or you can use it to book a Campus Keke.
So if you are driving yourself, you do not need to book a keke by mistake. And if you are looking for a keke, you need to choose the correct ride option.
For personal navigation, the process is simple:
- Open Rides & Routes.
Tap Drive.
- Set your destination using the search box, or tap a map pin on campus.
In Ride Options, tap Drive Personal Car.
- Review the Route Summary.
- Tap Begin Navigation.
- Follow the navigation instructions.
That is self-navigation.
If you are not driving yourself, do not choose Drive Personal Car. Instead, look under the ride booking section for OR BOOK RIDE.
That is where Campus Keke comes in.
Book Campus Keke without arguing fare on the road
Now we have reached the part many students actually care about.
You want a keke.
You want it to come to your pickup point.
You want to know the fare before you enter.
You want to know when the rider accepts.
You want to know when the rider arrives.
And you would prefer not to start a roadside debate about the price of the trip.
DexTask handles the booking flow inside Rides & Routes.
When you set your destination and select Campus Keke, DexTask shows available rider options. Each rider card can show the total fare in naira, and where applicable, a pickup fee line such as +₦... pickup fee.
It can also show the rider's estimated arrival time and distance.
So instead of guessing what the trip might cost, you can see the amount presented by the app before selecting the rider.
Important point: the keke fare is not paid inside DexTask. You pay the operator in cash or transfer after the trip.
Yes, cash or transfer
Keep your money ready. The app is doing the booking and trip information part, not collecting your keke payment.
EXACT TAPS: Campus Keke from destination to cash + rating
Here is the full Campus Keke process.
- Open DexTask.
- Tap Rides & Routes.
- Tap Drive.
- Set your destination by searching in Where are you going? or selecting a map location.
In Ride Options, find OR BOOK RIDE.
- Tap Campus Keke.
- Confirm that the option says Private · Just for you.
- Review Choose a keke rider.
- Check each rider card for the total fare in ₦, plus any displayed pickup fee, ETA, and distance.
- Tap the rider you want.
- Wait for the request to be accepted. The app can show Waiting for {name}.
- If necessary, you can use Cancel request while waiting.
- Once the rider accepts, the rider will be coming to pick you up.
- When the app says the rider has arrived, wait for the operator to start the trip.
- During the trip, watch the live tracking on the map.
- If you need to communicate, use the Chat button, which can show Chat · {name} or Message driver.
- When the trip is complete, tap Proceed to pay & rate.
- Pay the operator in cash using the total fare shown by the trip.
Submit your operator rating in DexTask.
- If something went wrong, you can use the available report options such as safety, unprofessional behaviour, wrong route/drop-off, fare dispute, or other.
That is the complete flow.
Notice the important difference: DexTask helps you choose the rider, see the fare, request the ride, track the trip, communicate in-app, and rate the operator. The actual keke payment is cash to the operator after the trip.
SHARE KEKE WHEN YOU WANT TO SPLIT THE VIBE AND THE COST
Sometimes you do not need a private keke.
Maybe you are going in the same direction as other students. Maybe you want to save a percentage of the fare shown in the app.
That is where Share Keke comes in.
The process starts the same way as a normal Campus Keke booking.
Open Rides & Routes, select Drive, set your destination, and then choose Share Keke.
The app describes this as matching with others going your way, with a percentage saving shown in the app.
Here is the flow:
- Open DexTask.
- Tap Rides & Routes.
- Tap Drive.
- Set your destination using search or the map.
- Tap Share Keke.
- Wait for co-passenger matching.
- Once matched, continue with the rider selection and normal hail flow.
- Follow the request, arrival, trip, tracking, payment, and rating process.
The important thing is that the saving is shown in the app. Do not invent your own percentage because your roommate confidently announced one in the hostel.
Let DexTask show you what applies to the trip.
What DexTask shows you before you enter the ride
One of the biggest advantages of using the Rides & Routes flow is knowing what is happening before you enter the keke.
For Campus Keke, the rider list can show:
- The rider option
- Total fare in naira
- Pickup fee where applicable
- Estimated arrival time
- Distance
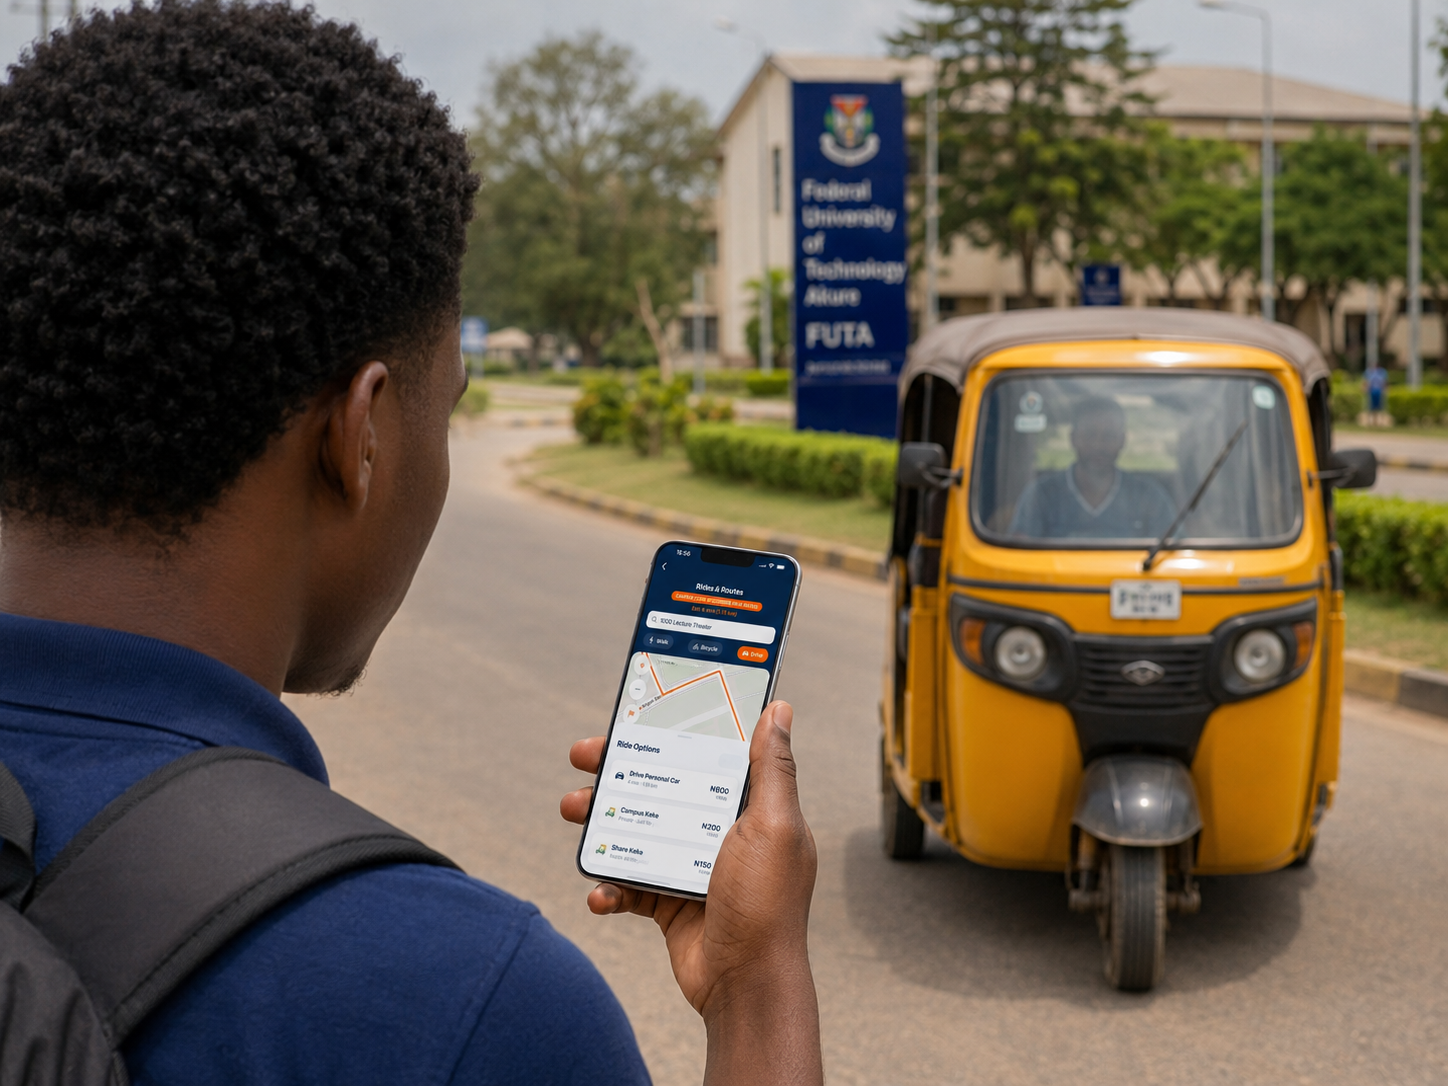
That means you have useful information before accepting a rider.
The fare is calculated using the trip distance and server configuration, then displayed as a naira total in the available rider options.
Campus areas can also have zone context, including names such as Campus Core, South Gate, and North Gate.
Again, use those names as part of your destination search when needed. You do not have to depend on somebody giving you a complicated route explanation.
Your process should be:
Open DexTask → Rides & Routes → choose your mode → search destination → review the route or rider information → continue.
Simple.
If you are booking a keke, check the displayed total before choosing your rider. If you are walking or cycling, check the estimated distance and duration before starting navigation.
Night, rain, and "please just get me home" moments
There are some campus moments when nobody wants an adventure.
It is late. You are tired. It starts raining. Your phone battery is giving you the final 7 percent warning. You just want to get where you are going.
This is exactly when you want your transport process to be clear.
Open DexTask, tap Rides & Routes, and use the map and destination search instead of trying to work everything out from memory.
If you need to book a Campus Keke, set the destination, choose Drive, then select Campus Keke under OR BOOK RIDE.
Review the rider options and displayed fare before making your choice.
If the rider accepts, you can see the waiting state and then track the trip on the map once the trip starts.
There is also an important difference between offline navigation and online ride functions.
The campus map can cache, and you may see a banner telling you that there is no internet while cached map tiles are available. Self-navigation can continue offline in supported situations.
But do not confuse that with booking a keke.
Booking and live ride tracking need internet.
So if you know you will need a ride, make sure you have connectivity before trying to book.
That distinction can save you from staring at your screen in the rain wondering why your keke has not appeared.
Chat, SOS, and staying safe in-app
During a Campus Keke trip, DexTask provides tools for communication and safety.
The in-app chat can appear as Chat · {name} or Message driver.
Use the chat inside DexTask when you need to communicate with the operator coming to pick you up.
There is also an SOS option available during the trip.
One important rule is shown in the product flow: keep communication inside the app. Do not share phone numbers, links, or payment details through the in-app chat.
You also do not need to use chat to negotiate a separate payment arrangement. The trip fare is already shown in the booking flow, and the keke payment is made in cash to the operator after the completed trip.
If there is a problem with the trip, the reporting options can include:
- Safety
- Unprofessional behaviour
- Wrong route/drop-off
- Fare dispute
Other
So if something goes wrong, do not just complain in your class WhatsApp group and hope the universe receives the complaint 😂😜.
Use the reporting option in DexTask.
What is not live yet (so nobody gets confused)
Let us clear this one up because "Coming soon" is not the same thing as "book it now."
Shuttle booking is not live yet.
The product may show Join Shuttle Pool with a Coming soon status. That means you should not treat shuttle booking as an available live transport option.
Also, do not expect a campus bus product to be available through this current mobility flow.
For now, the active Rides & Routes experience covers the navigation modes and Campus Keke flows described in this guide.
You can use:
- Walk
- Bicycle
- Drive Personal Car
- Campus Keke
- Share Keke
Shuttle booking is Coming soon.
Another important point is availability outside FUTA. Campus Keke availability depends on the supported campus context. Walk, bicycle, or drive navigation can still work depending on the available scope.
So if you are outside FUTA and do not see Campus Keke availability, do not start blaming your phone. The ride service is campus-focused.
Final checklist + download DexTask
Before your next trip around FUTA, remember this simple routine.
If you need directions
- Open DexTask.
- Tap Rides & Routes.
- Choose Walk, Bicycle, or Drive.
- Tap Where are you going?
- Search for your destination.
- Select the correct result.
- Review the route estimate.
- Tap Start Navigation.
- In FutaMove, tap Begin Navigation.
- Follow the navigation cues.
If you need a Campus Keke
- Open DexTask.
- Tap Rides & Routes.
- Tap Drive.
- Set your destination.
- Under OR BOOK RIDE, tap Campus Keke.
- Review rider cards, fare, pickup fee where applicable, ETA, and distance.
- Select a rider.
- Wait for acceptance.
- Track the rider's arrival.
- Let the operator start the trip.
- Track the trip on the map.
- Use in-app chat if needed.
- Use SOS if needed.
- At the end, tap Proceed to pay & rate.
- Pay the operator in cash.
- Rate the operator.
- Report any issue using the available report options.
If you want to share the ride
Open Rides & Routes, choose Drive, set your destination, tap Share Keke, and wait for co-passenger matching. The app shows the applicable saving percentage.
That is the whole idea behind Rides & Routes: make campus movement easier to understand before you start moving.
Instead of guessing where you are going, search it.
Instead of entering a keke without knowing what the app shows for the trip, check the rider options and displayed fare.
Instead of wondering where your rider is, follow the ride status and live tracking.
Instead of ending the trip and forgetting about it, proceed to pay and rate.
If you are a FUTA student and you want to try DexTask Rides & Routes for yourself, download DexTask here:
Open the app, tap Rides & Routes, and start with something simple. Search for a campus destination, check the route, and get familiar with the flow.
FUTA is already busy enough. Your transport experience does not need to add extra drama.
Written by
Kpenhangen Barnabas Tersue · DexTask
Publisher: DexTask
Published on the DexTask blog covering campus mobility, student infrastructure, and product updates across Nigeria and Africa.
Related posts
How to Spot and Avoid Fake Off-Campus House Agents
Looking for a house outside campus? Learn how to identify fake agents, verify property listings, avoid suspicious payments and make safer accommodation decisions.
Buying Fairly Used Gadgets on Campus: A Checklist
A fairly used gadget can save you money, but a bad deal can leave you with an expensive problem. Use this simple checklist before buying a phone, laptop or other gadget on campus.
10 Best Side Hustles for Nigerian Students in 2026
Looking for a side hustle as a Nigerian student? Here are 10 realistic ways to earn around your lectures, plus how DexTask can help you turn your skills into campus opportunities.